
Your website is sitting on a server somewhere. Every visitor connects directly to that server, no matter where they are in the world. A visitor from Zagreb, a visitor from Tokyo, a visitor from New York. All hitting the same machine in the same data center.
Cloudflare sits between your visitors and your server. It caches your content across 330+ data centers in over 120 countries, blocks malicious traffic before it reaches you, and speeds up delivery for everyone. The free plan covers most of what small and medium businesses need.
Here's how to set it up properly.
Why Cloudflare matters for your site
Three reasons. Speed, security, and reliability.
Speed. Cloudflare's CDN (Content Delivery Network) stores copies of your static files (images, CSS, JavaScript) on servers around the world. When someone in Munich visits your site, they get served files from a nearby Cloudflare server instead of your hosting in Croatia. The difference is noticeable. Page speed improvements of 30-60% are common for sites with international visitors.
Security. Cloudflare filters traffic before it reaches your server. DDoS attacks, malicious bots, brute force login attempts. All handled at the edge. This is especially valuable if you're running WordPress or any CMS where security requires constant vigilance.
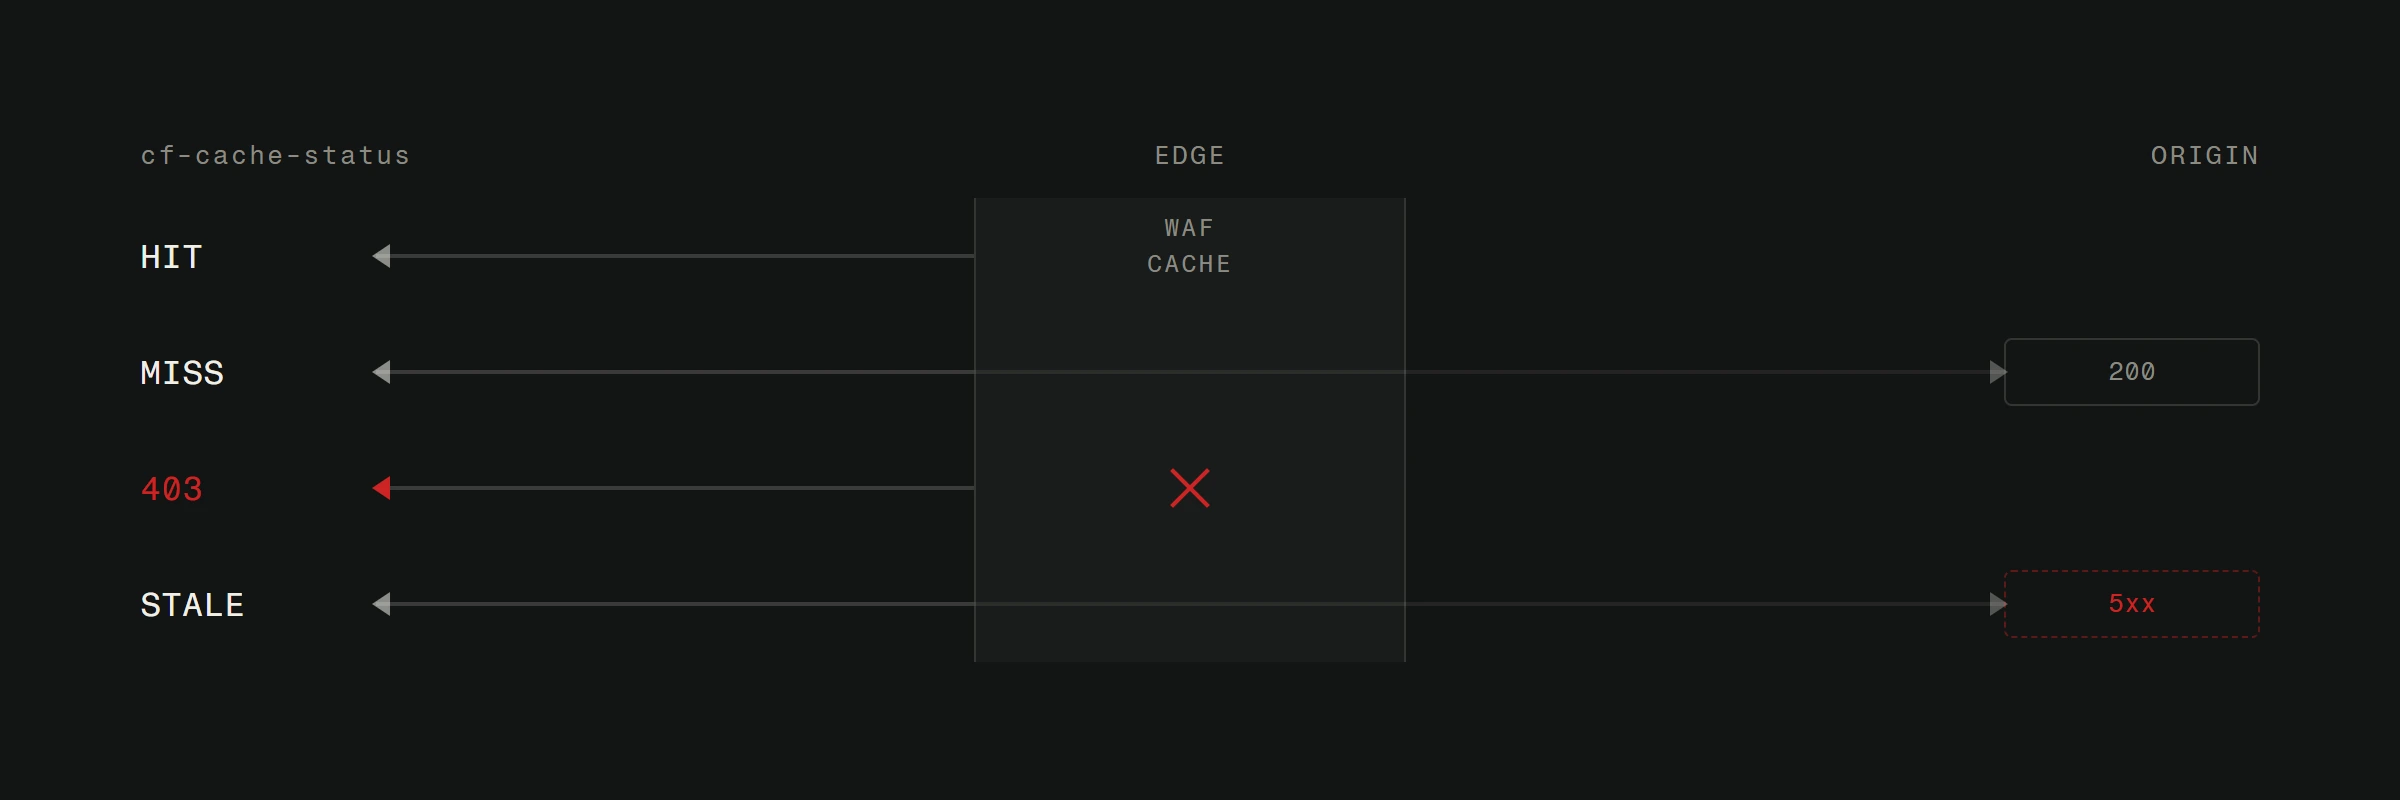
Reliability. If your server goes down, Cloudflare can serve a cached version of your site. Visitors see a slightly stale page instead of an error screen. Not perfect, but infinitely better than nothing.
And again: the free plan does all of this.
Before you start
You'll need three things.
Access to your domain registrar. This is wherever you bought your domain name (GoDaddy, Namecheap, Squarespace, your local Croatian provider). You'll need to change nameservers, so make sure you can log in and edit DNS settings.
A list of your current DNS records. Cloudflare will scan these automatically, but having your own reference helps catch anything that gets missed. Log into your current DNS management, screenshot everything, or export the zone file if your provider allows it.
30 minutes of uninterrupted time. The setup itself takes about 10 minutes. But DNS propagation can take up to 48 hours (usually much faster). Plan to do this during a low-traffic period, not right before a product launch.
Step-by-step setup
1. Create a Cloudflare account
Go to cloudflare.com and sign up. Use an email you actually check. Cloudflare sends important notifications about security events and configuration issues.
2. Add your website
Click "Add a Site" and enter your domain name. Just the domain, no www or https prefix. For example: yourdomain.com.
Cloudflare will ask you to pick a plan. Start with Free. You can upgrade later. The free plan includes CDN, basic DDoS protection, SSL, and enough features for most sites.
3. Review DNS records
Cloudflare scans your existing DNS records and imports them. This is the most important step. Check every record carefully.
A records point your domain to your server's IP address. These should be "proxied" (orange cloud icon) so traffic goes through Cloudflare.
CNAME records point subdomains to other domains. Proxy these too, unless you have a specific reason not to.
MX records handle email routing. These should NOT be proxied. If you proxy MX records, your email breaks. Cloudflare should set these to "DNS only" (gray cloud) automatically, but verify.
TXT records handle things like domain verification and email authentication (SPF, DKIM, DMARC). These stay DNS-only.
Missing a record here means that service stops working once you switch nameservers. Double-check against your earlier DNS screenshot.
4. Change your nameservers
Cloudflare gives you two nameserver addresses. Something like ada.ns.cloudflare.com and wes.ns.cloudflare.com.
Go to your domain registrar. Find the nameserver settings. Replace your current nameservers with the two Cloudflare provided. Save.
This is the point of no return (sort of). Once DNS propagates, all traffic flows through Cloudflare. If you made a DNS record mistake in step 3, you'll find out now. That's why the backup screenshot matters.
Propagation usually takes 15 minutes to a few hours. Occasionally up to 48 hours. Cloudflare emails you when it's active.
5. Configure SSL/TLS
Once Cloudflare is active, go to SSL/TLS settings. You have four options.
Off: No encryption. Never use this.
Flexible: Encrypts traffic between visitors and Cloudflare, but NOT between Cloudflare and your server. Use this only if your hosting absolutely cannot support SSL.
Full: Encrypts everything, but doesn't verify your server's certificate. Better than Flexible.
Full (Strict): Encrypts everything and verifies your server's SSL certificate. This is what you want. If your hosting supports SSL (most do), use Full (Strict).
Set "Always Use HTTPS" to On. Set "Automatic HTTPS Rewrites" to On. These ensure visitors always get the encrypted version of your site.
6. Set up rules
Cloudflare's Rules let you control behavior for specific URLs. The legacy "Page Rules" feature was deprecated in 2024-2025 and replaced by more powerful modern rule types: Cache Rules, Configuration Rules, Redirect Rules, and others.
Cache Rules for static pages. If you have pages that rarely change (like a landing page), create a cache rule to cache the entire HTML. This makes those pages load incredibly fast.
Configuration Rules for admin areas. If you run WordPress, create a configuration rule for yourdomain.com/wp-admin/* to bypass the cache. Otherwise you might see stale content in your admin panel.
Redirect Rules for HTTPS. Create a redirect rule to send all HTTP traffic to HTTPS if the automatic setting doesn't catch everything.
Common problems and how to fix them
Mixed content warnings. Your site loads over HTTPS but some resources (images, scripts) still load over HTTP. Fix these at the source by updating URLs in your CMS. Cloudflare's Automatic HTTPS Rewrites help, but don't catch everything.
Infinite redirect loops. This happens when your server forces HTTPS and Cloudflare's SSL mode is set to "Flexible." Cloudflare connects to your server over HTTP, your server redirects to HTTPS, Cloudflare connects over HTTP again. Loop. Fix: set SSL to "Full" or "Full (Strict)."
Stale cached content. You update your site but visitors see the old version. Go to Cloudflare dashboard, Caching, Purge Everything. Or better, purge specific URLs that changed. Set up a cache purge after deployments if you deploy frequently.
Email stops working. You proxied your MX records. Go back to DNS, find your MX records, click the orange cloud to turn it gray (DNS only). Email flows again.
WordPress login issues. Cloudflare's security features sometimes flag legitimate login attempts. Whitelist your IP address in Cloudflare's firewall rules. Or create a page rule to reduce the security level for your login URL.
Performance settings worth enabling
In the Speed section of your Cloudflare dashboard, enable these.
Brotli compression. Better than gzip. Reduces file sizes further. No reason not to enable it. Note: Cloudflare's Auto Minify feature was deprecated in August 2024. Minification should now be handled at build time through your framework or build tools.
Early Hints. Tells browsers to start loading resources before the full page response arrives. Slight improvement in perceived load time.
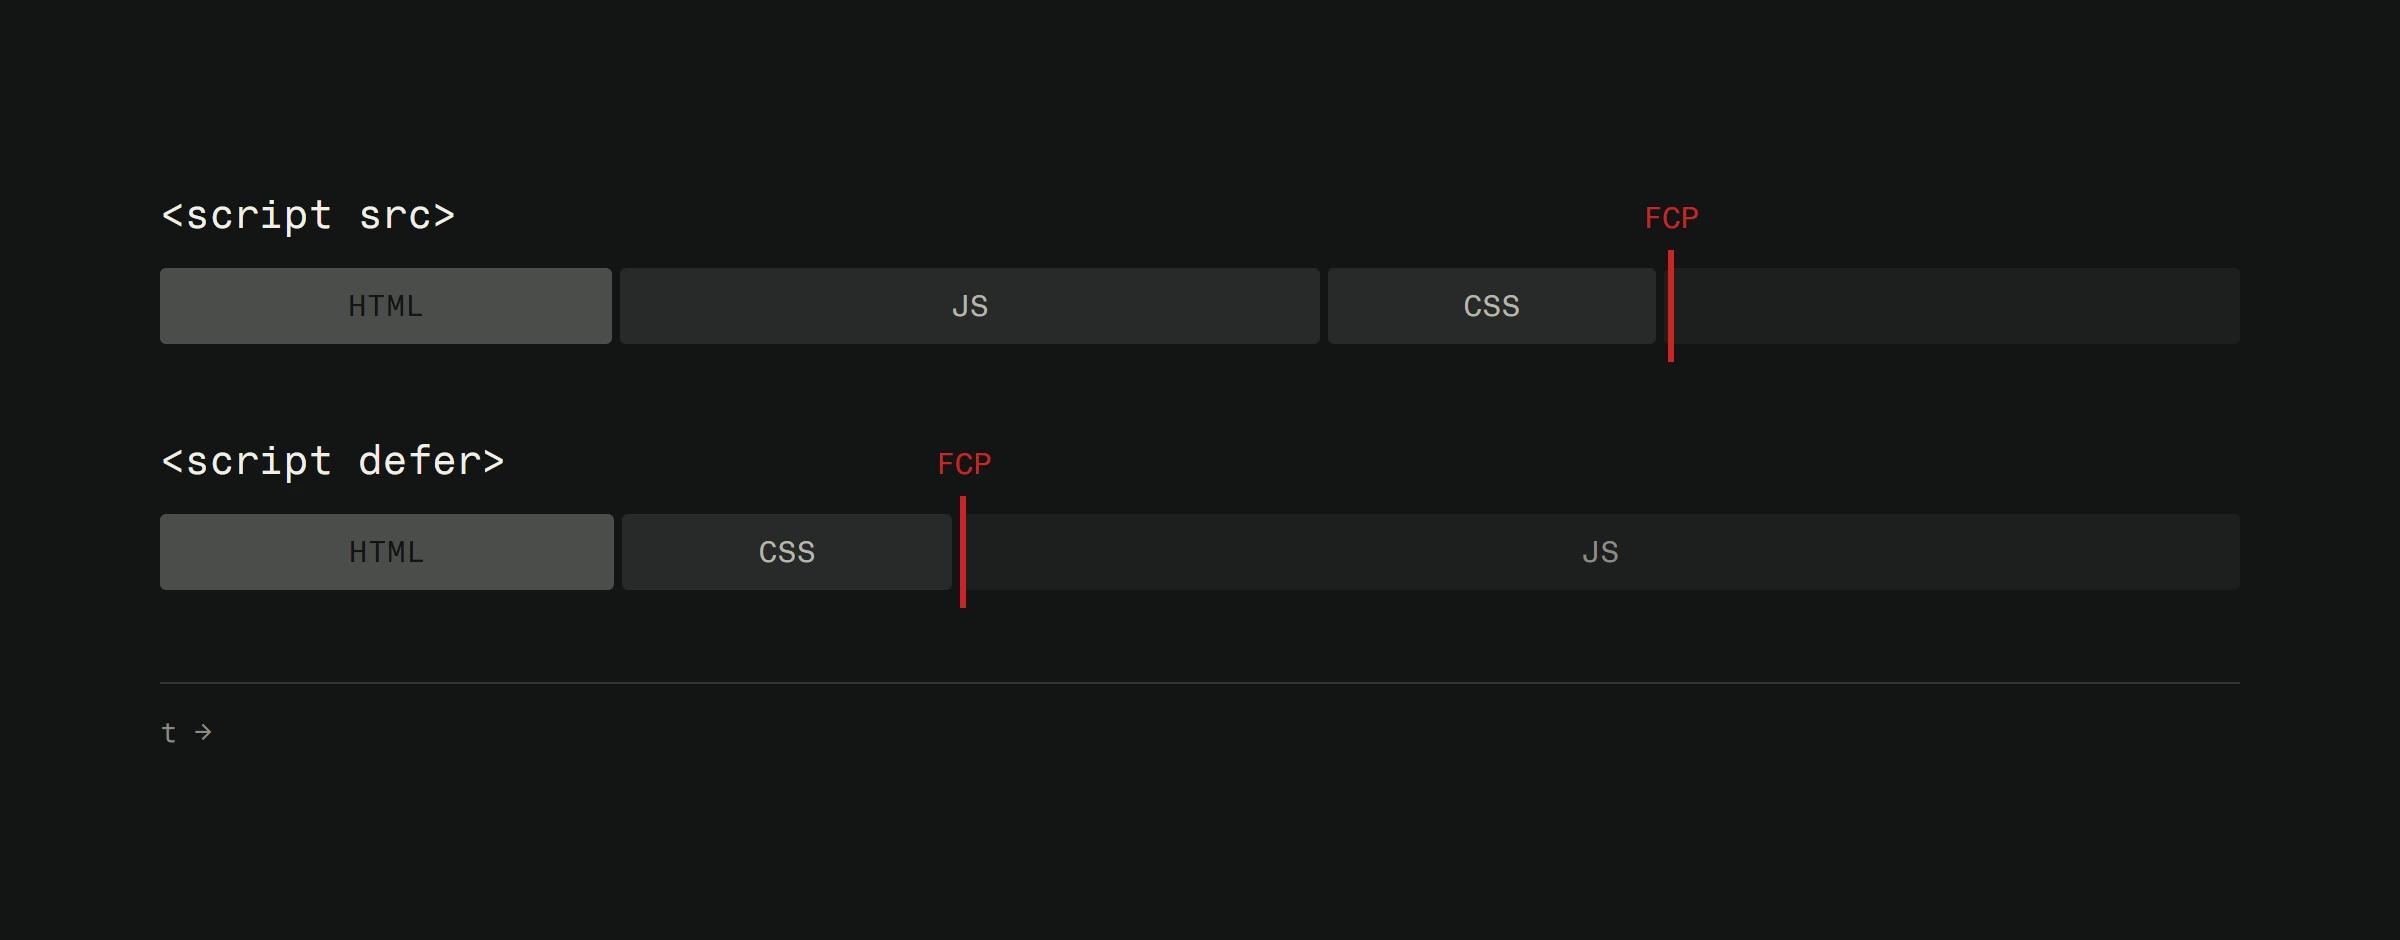
Rocket Loader (use with caution). Defers all JavaScript loading. This can break some sites. Enable it, test thoroughly, disable if anything breaks.
What the free plan doesn't cover
The free plan is generous, but paid plans add real value for businesses that need it.
Pro ($20/month): Better image optimization, a Web Application Firewall with managed rulesets, and mobile optimization. Worth it for business sites with significant traffic.
Business ($200/month): Custom SSL certificates, advanced DDoS mitigation, and 100% uptime SLA. For sites where downtime costs real money.
For most small business sites and landing pages, the free plan is plenty. Start there. Upgrade when you hit a specific limitation, not because a feature list looks appealing.
Is Cloudflare enough for site security?
Cloudflare adds a significant security layer. But it's not a complete security strategy. You still need to keep your CMS updated, use strong passwords, limit admin access, and follow security best practices on your actual server.
Think of Cloudflare as a bouncer at the door. Important, but not a substitute for locking the safe inside.
Need help configuring Cloudflare or a full performance and security audit? Explore our web design services or get in touch and we'll make sure your site is fast, secure, and properly configured.